Have you heard? Elastic hair ties are all the rage! My Birchbox (click here for more info) even sent me a elastic head band last month, and I LOVE it! It doesn't give me a headache, it doesn't pull or get caught in my hair and best of all it doesn't leave a dent in my hair! Yes, dent! We aren't talking cars here but rather beauty! You know...the ugly indentation your headbands and hair ties leave in your hair after wearing them for any amount of time! Ugh...hate it! Makes it hard for us housewives who work hard all day with our hair in a ponytail to let our hair down for a date night with the hubby later that same day. I am ecstatic about the hair freedom this little tie brings me! Dramatic? I am. I picked up a couple of the actual hair ties at Target and paid close to $2 for them. Pricey! I knew I could make them for cheaper so I surfed the web so find some 5/8" fold-over elastic! I also threw together some cute holders so I could gift these to faimly and friends. I purchased my fold over elastic online from TheRibbonRetreat.com they have a good selection of 26 colors and I received my order in two business days! At $1 for 2 yards the price couldn't be beat!
Here's what you need:
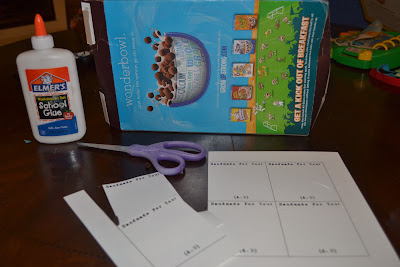
If you would like to make the holders you will need:
- Card stock print out with a table with two rows and three columns with whatever wording you choose
- Empty cereal box
- Elmer's Glue
- Scissors

 This project is super easy! In fact, it took me longer to make the little customized holders than to make the actual hair ties! Easy peasy, as my son says. Use your ruler, or measureing tape and cut your elastic at 8.5" Making sure to fold the elastic leaving the shiny side out knot the elastic into itself and pull tight. You may want to try out this sizing on your hair to see if you need to adjust it smaller or longer. Also, be sure to cut the ends at a angle to prevent any future fraying or unraveling of the elastic! I actually bought two from Target last week and they were about the same size I made tonight, so it may be a pretty good "universal" size. I love that they look like little ribbons and you can easily wear them on your wrist while you don't need it in your hair. They don't pull at your hair, or get your hair caught on them in any way. My favorite part is they don't leave any indentations from having your hair up in a ponytail! SAVED! Sometimes we women need to throw our hair up for a short while and would like to pull it back down in to it's beauty flowing glory free of any awkward dents! Now you can! Yipee!
These little hair ties are easy to make and would make great little gifts for family and friends! Nothing like a little beauty item to brighten any woman's day! Making the holders was super easy as well. I created a table on my Pages document 2 rows big and 3 columns wide. The measurements are 3" column width and 3.25" column height. I used a font called CarbonType at 16pts. for my wording. I printed this on to card stock and grabbed an empty cereal box I was about to toss out. I cut out the squares and cut squares out in the same size from the cereal box. Using Elmer's glue I covered the printed side of the cardboard from the box and placed my card stock square over it. This way the back is just brown cardboard looking. Allow it to dry and then add your ties for a sweet gift!
 |
| Cover printed side of cardboard box in glue |
 |
| Lay card stock piece on top of glue and press firmly to ensure all sides are down |
 |
| VOILA! |
{QoK}


No comments:
Post a Comment